
Inteliguide is a Schedule Management System and Shifts are its absolute backbone. Why? Because Inteliguide centers around the Scheduling of Users to work Shifts at specific Times on specific Days at specific Locations. All Accounts and most activities in the system surround or are affected by Shifts.
We've always thought it was helpful to think of Shifts like appointments. They're really no different functionally beyond being created by some, and filled (or committed to) by others. Admins may create them, and workers can Commit to them and work them. Admins or Manager Users (all users but Client, Cop, and Civilian) may also work Shifts. Activity Reports are attached to the Shifts as are relevant Time Punches. Once work is complete, or the appointment has been filled - to follow the analogy, Reports then look to specific attributes of the Shift to calculate Payroll and Billing.
To really get a firm grasp of how Shifts are used, don't forget to check out the Dash, Schedule, Agenda, and Shift Defaults in Tips & Tricks to learn more about how Shifts are utilized throughout the application.
Once some Businesses, Locations, Groups, and Users have been created in the system, you can go about creating Shifts.
Creating Shifts
There are two ways to create Shifts in Inteliguide:
- Quick Add - on the Schedule itself
- Add Shifts Form
Quick Add
This is referenced elsewhere, here and here. It's a very quick and efficient way of easily adding Shifts to the Schedule. This is a "one off" solution, however, so a more robust method is allowed for in the Add Shift Form. You can get to the form via the 'advanced' link on the Quick Add popup, and any values you've already entered should be preserved on the corresponding full Form.
Add Shifts Form
This form is comprised of the following major components:
- Shift For
- Dates & Times
- Assigned To
- Options
- Locations (for if Shift is for a Group), Codes, Dispos & Instructions
Required Fields
- Location/Group Selection
- Dates & Times (at least one day, it defaults to the current date/time)
- Assigned To (Either Pending/Available, or Schedule a User)
That's it! But, if you wanna get into the gritty details... you can modify any of the below.
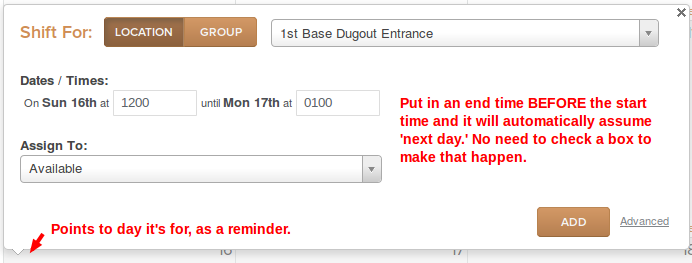
Shift For
This section allows you to choose either a Location or a Group that the Shift(s) is/are being created for.

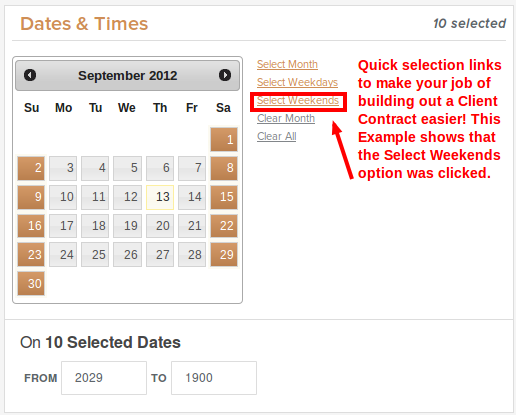
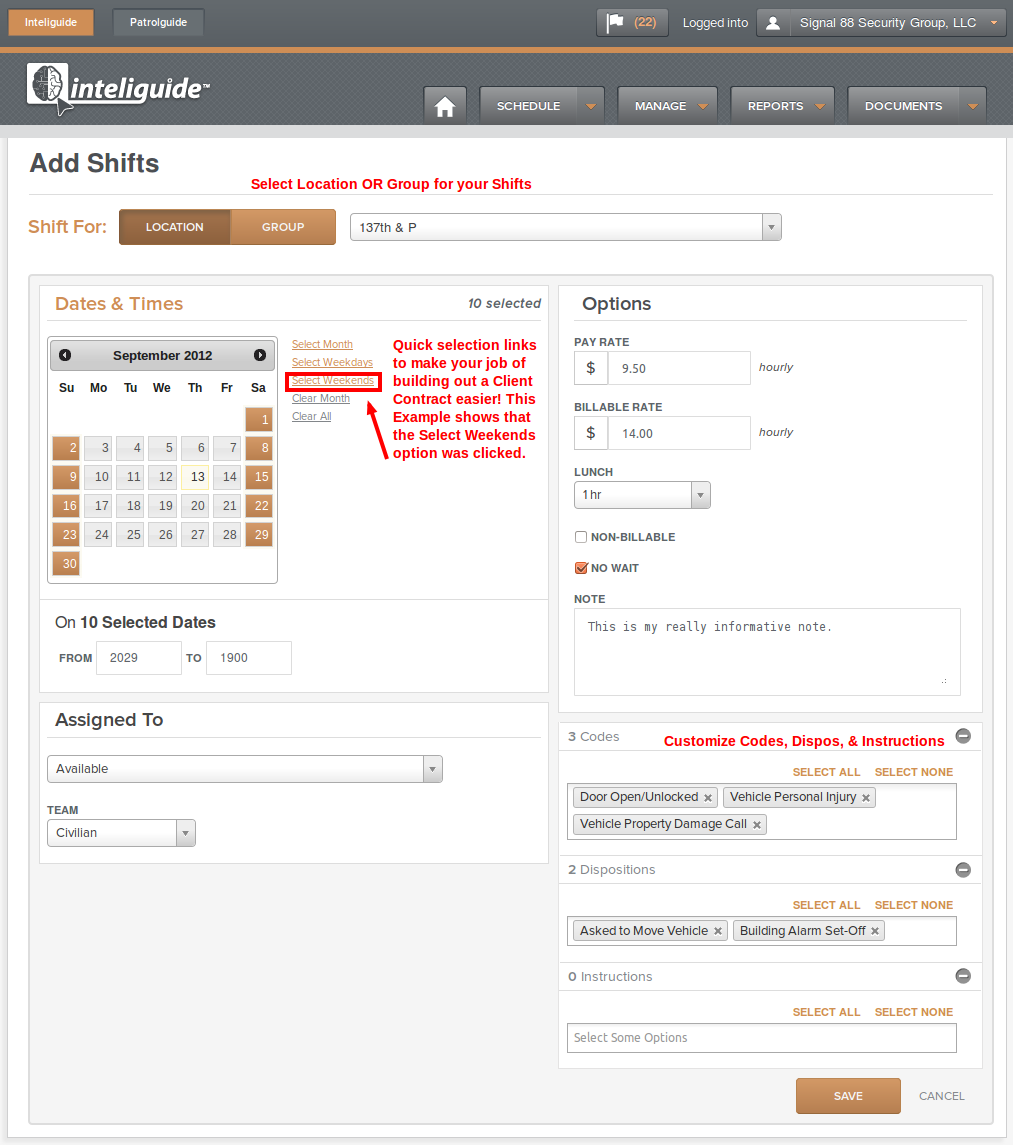
Dates & Times
We put a lot of thought, time and effort into making this section as intuitive and easy-to-use as we possibly could. We think it's incredibly easy compared to legacy to Bulk Add Shifts to your Schedule.
Simply click around the reference Calendar to select one or many days, or use the handy links to the right of it to select many days at once. Make whole Month, Weekdays, or Weekends of selections! Clear the currently viewed month, or clear ALL your selections, all at the click of a button.
The Times (Start/End) feature a nifty Time Picker control for if you're feeling a little less motivated to use the keyboard:

Selecting an End Time that is less than the Start Time will automatically result in the Shift being created with an end time for the next day. It's auto-sensing like that!
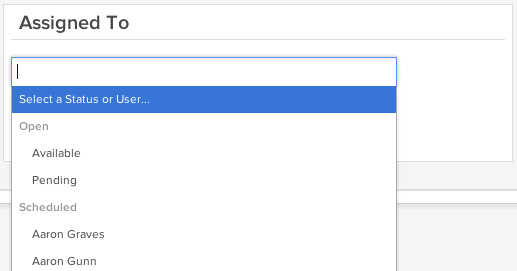
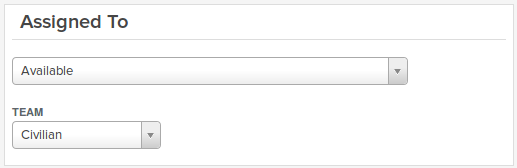
Assigned To
This section is pretty simple. Here we get at least two different operations for the price of one in the 'Select Some Options...' drop down. It both assumes statuses of Available or Pending, and SETS the status of the Shifts you're creating to Scheduled if you select a specific User. You can add one or many Statuses and/or Scheduled Users. For every Status/User you add, a new set of shifts given the Selected Dates will be created. For example, if you have seven Selected Dates, and three Statuses/Users selected (say Available and Pending and one User), you'll end up with 21 Shifts on the Schedule; 7 Available Shifts for the Selected Dates & Times, 7 more for Pending, and 7 more that are setting the Shift to Scheduled for your selected User.
The Team drop down allows for selecting Any, LEB, or CBS teams.
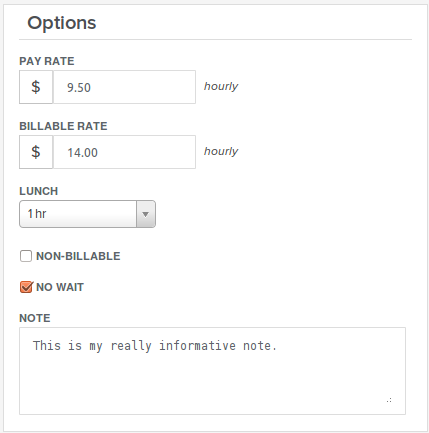
Options
Dollars and cents, like in the below example. It's very important to note there that ALL Payroll and Billing are derived from THESE values!
Lunch:
If a lunch is selected, then that will open the option on the Dash, Shift Details, and in Mobile for Users to make Punches for Lunch or edit them if they're Admins.
Non-billable:
Any Shifts marked as Non-billable will be excluded from the Billing Report Totals.
No wait:
If checked, Users don't have to wait to Commit to Available Shifts, regardless of their Priority Rank.
Note: The application DOES NOT validate the Pay and Billable Rate by which one is higher or lower than the other.
Note:
Then there's always the ability to add a Note to your Shift(s).
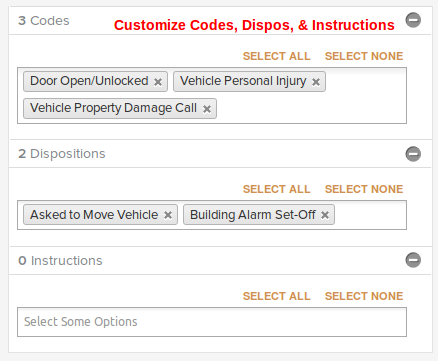
Locations, Codes, Dispos, and Instructions
Locations shows up if you select a Group, you can expand that section to see the Locations that belong to the Group you selected.
Codes, Dispos, and Instructions can all be informed by your selection of a Location or Group if you've established Shift Defaults prior to creating your Shift(s).
This section starts out collapsed because we want to encourage you to set Shift Defaults that allow you to quickly create Shifts without thinking about their attributes and options; while at the same time allowing you to customize them on a Shift by Shift basis, as needed.
Full Add Shifts Form
Working with Shifts
Once you create a Shift, you need to be able to work with it in various capacities:
- Shifts Have Statuses
- Committing to a Shift
- Working a Shift
- Editing a Shift
- Consuming Shift Data
Shifts Have Important Statuses & Attributes
This is a fairly basic concept, and Statuses apply to nearly every piece of data in the system, so why talk about it? Well, the statuses of Shifts go beyond Active/Inactive. Their Status helps define the way you'll work with them. Here's a list of all the possible Shift Statuses, followed up by a description:
Top Level Statuses
- Pending
- Available
- Scheduled
- In Progress
- Completed
- Cancelled
Pending
If a Shift is created in Pending Status, then it will remain that way until an Admin Releases it via Pending Shifts. Once the Shift is released, its Status is set to Available.
Available
Shifts in this status can be Committed to. Once you or other Users Commit to a Shift, its Status will change to Scheduled.
Scheduled
Once a Shift is in Scheduled Status, Users can work them. Clocking into a Shift can be found in Actions on the Dash and through Mobile. Once workers clock into a Shift, its Status changes to In Progress.
Note: Users can Clock In to a Shift up to a half-hour before it begins, and at any time until it ends. If a User fails to clock into a Shift while it's available to be worked (a half hour before and after the Start/End Date/Time Range), the Shift will remain in a Scheduled Status and must be modified by an Admin or Scheduler User.
In Progress
While working a Shift, Users can conduct operations associated with it. Those include being able to make Time Punches for Lunch or to Clock Out, and while the Shift is being actively worked, Users have access to Activity Report writing features through the Dash and Shift Details pages. Reporting through Mobile is coming soon!
Once a User Clocks Out of a Shift, its Status changes to Completed.
Note: Users can Clock Out of a Shift up to half an hour after the Shift ends. If the User fails to Clock Out in time, the Shift remains In Progress and an Admin or Scheduler User must edit the shift to change its Status to Completed.
Completed
This is the ideal Status for past Shifts and is the recommended Status on which to run Payroll and Billing operations and Reports.
Cancelled
This is for Shifts that have been created and then become unnecessary for whatever reason.
Check out this handy tip on deleting unwanted Shifts!
- LEB
- CBS
- ANY
Any Team is actually an entirely different attribute for a Shift than just either LEB or CBS. If a Shift is created for Any Team, CBS and LEB Users (Civilians and Cops, respectively) can Commit to it.
Other Attributes
- Non-billable (Shifts marked as such will not have their values added to the Totals in the Billing Report)
- Inactive User (Shifts that have been worked by Users who are subsequently Archived show up on the Schedule in red)
Committing to a Shift
Any user except Client Users can work Shifts. As such, you can either Schedule yourself or others if you're an Admin or Scheduler User, or you can Commit to an Available Shift as long as you belong to the appropriate Team (see above).
Commit to Shift
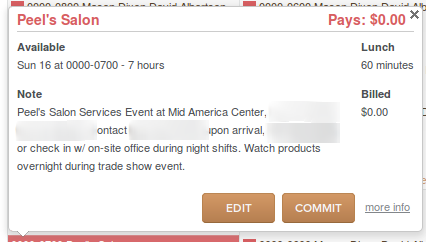
Commit to Shift Confirm
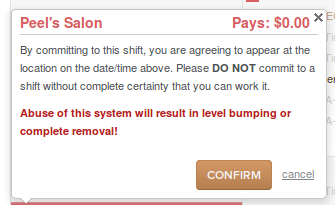
More detail here.
Note: Once a User confirms a Shift Commitment, they'll receive an initial notice with an appointment for Outlook and other calendars AND up to two reminder messages about their Shift depending upon how far out in advance they are from actually working it. Their reminders will come in one/more of three ways depending on what the User is opted-in for: Mobile, Email, and/or SMS.
Working a Shift
Check out the Shift Dash for some more detail on this topic.
For a half hour before and after a Shift is Scheduled, Users will have access through the Shift Dash to Clocking In/Out of the Shift. That's really all you need to do to work a Shift through the browser or Mobile.
Additional Shift Actions include writing Activity Reports, reading existing reports, viewing the Schedule and viewing Shift Details.
Writing Activity Reports through Mobile is coming soon!
Editing a Shift
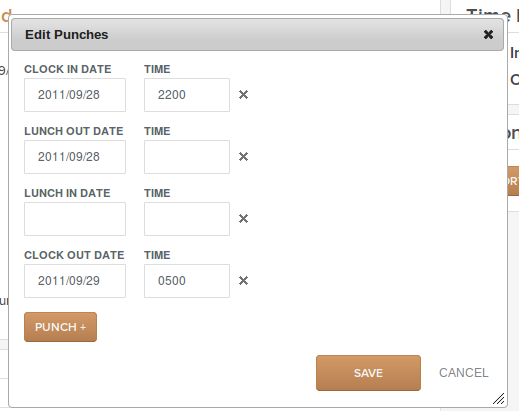
Shift attributes can be Edited through Bulk Shift Editing on the Agenda and one at a time via the Shift Edit Form, but Time Punches can be edited by Admins on Shift Details.
Time Punches
Shift Edit Form
https://lyconic.zendesk.com/entries/21998242-shifts#add
Consuming Shift Data
As mentioned elsewhere throughout this documentation, it's important to emphasize how Shifts inform the Billing and Payroll Reports. No matter where values for Pay Rate or Billable Rate are stored, in User - Location or Group Accounts, those values DO NOT inform Billing or Payroll. The values for those Reports flow from the Shifts themselves. This is useful in two ways.
- While Shifts may demand slight tweaks when responding to real-life situations, typical values may be preserved in the Accounts themselves.
- Shifts help create a living record of how Accounts have changed. Knowing what a typical Shift value for the Pay and Billable Rate over the life of a Contract can make for some very useful Reporting.
Note: Payroll is now calculated NOT on the Scheduled Shift Start/End Date/Times (like in legacy), but on the Time Punches made while working a Shift. If the User during Shift Operations lacked access to a browser or mobile device with Internet access, and no Time Punches were made... that User would NOT be included for the respective pay for that Shift. Admins can now Edit Time Punches for each Shift individually on that Shift's Detail page.
You can find out more on consuming Shift Data in Billing and Payroll.
0 Comments