
Looking for quick info on adding a Dedicated Work Order? Click Here
Dedicated Work Orders have been one of the most anticipated feature additions to Inteliguide, and we're excited to announce they're finally available in V2. View the announcement here!
Don't forget to check out Basic List Navigation in Tips & Tricks.
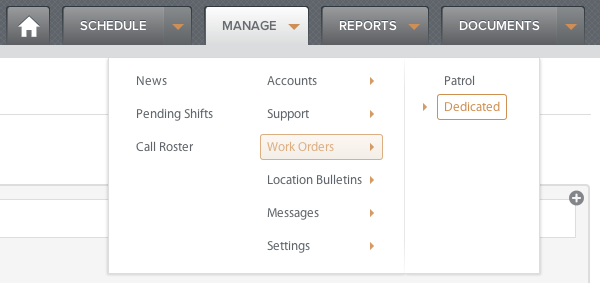
Note: Admins can access Dedicated Work Orders by clicking on the Manage menu drop down.
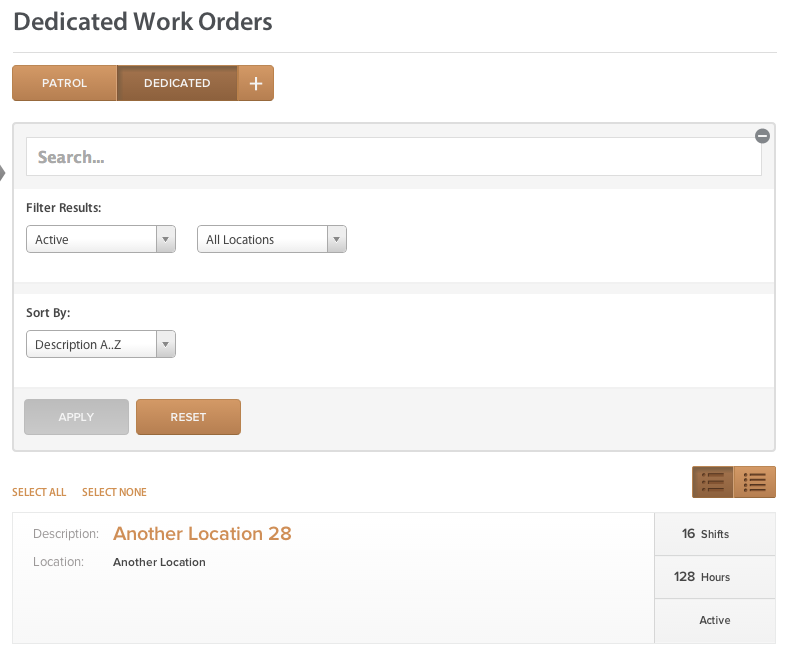
List
Search By
- Description
Filter By
-
Active
- Archived
- Pending (Dedicated Work Orders that are set to come on-line in the future)
- All Records
-
All Locations
- Active Locations
Sort By
- Description A..Z
- Description Z..A
- Location A..Z
- Location Z..A
- Archive/Unarchive
- Print Detailed
- CSV Export
Print
This prints out the contents of the selected List as seen on the screen.
Detailed Print
This prints out the individual Detail View of each of the selected Work Orders.
CSV Export
This sends a System Message to your Inbox with a CSV attachment of the selected Work Order details. Dedicated Work Orders feature columns for Codes, Dispositions, and Instructions as simple arrays, and for Shift Schedules as JSON objects.
Clicking on the List Item link will take you to the Dedicated Work Order Details.
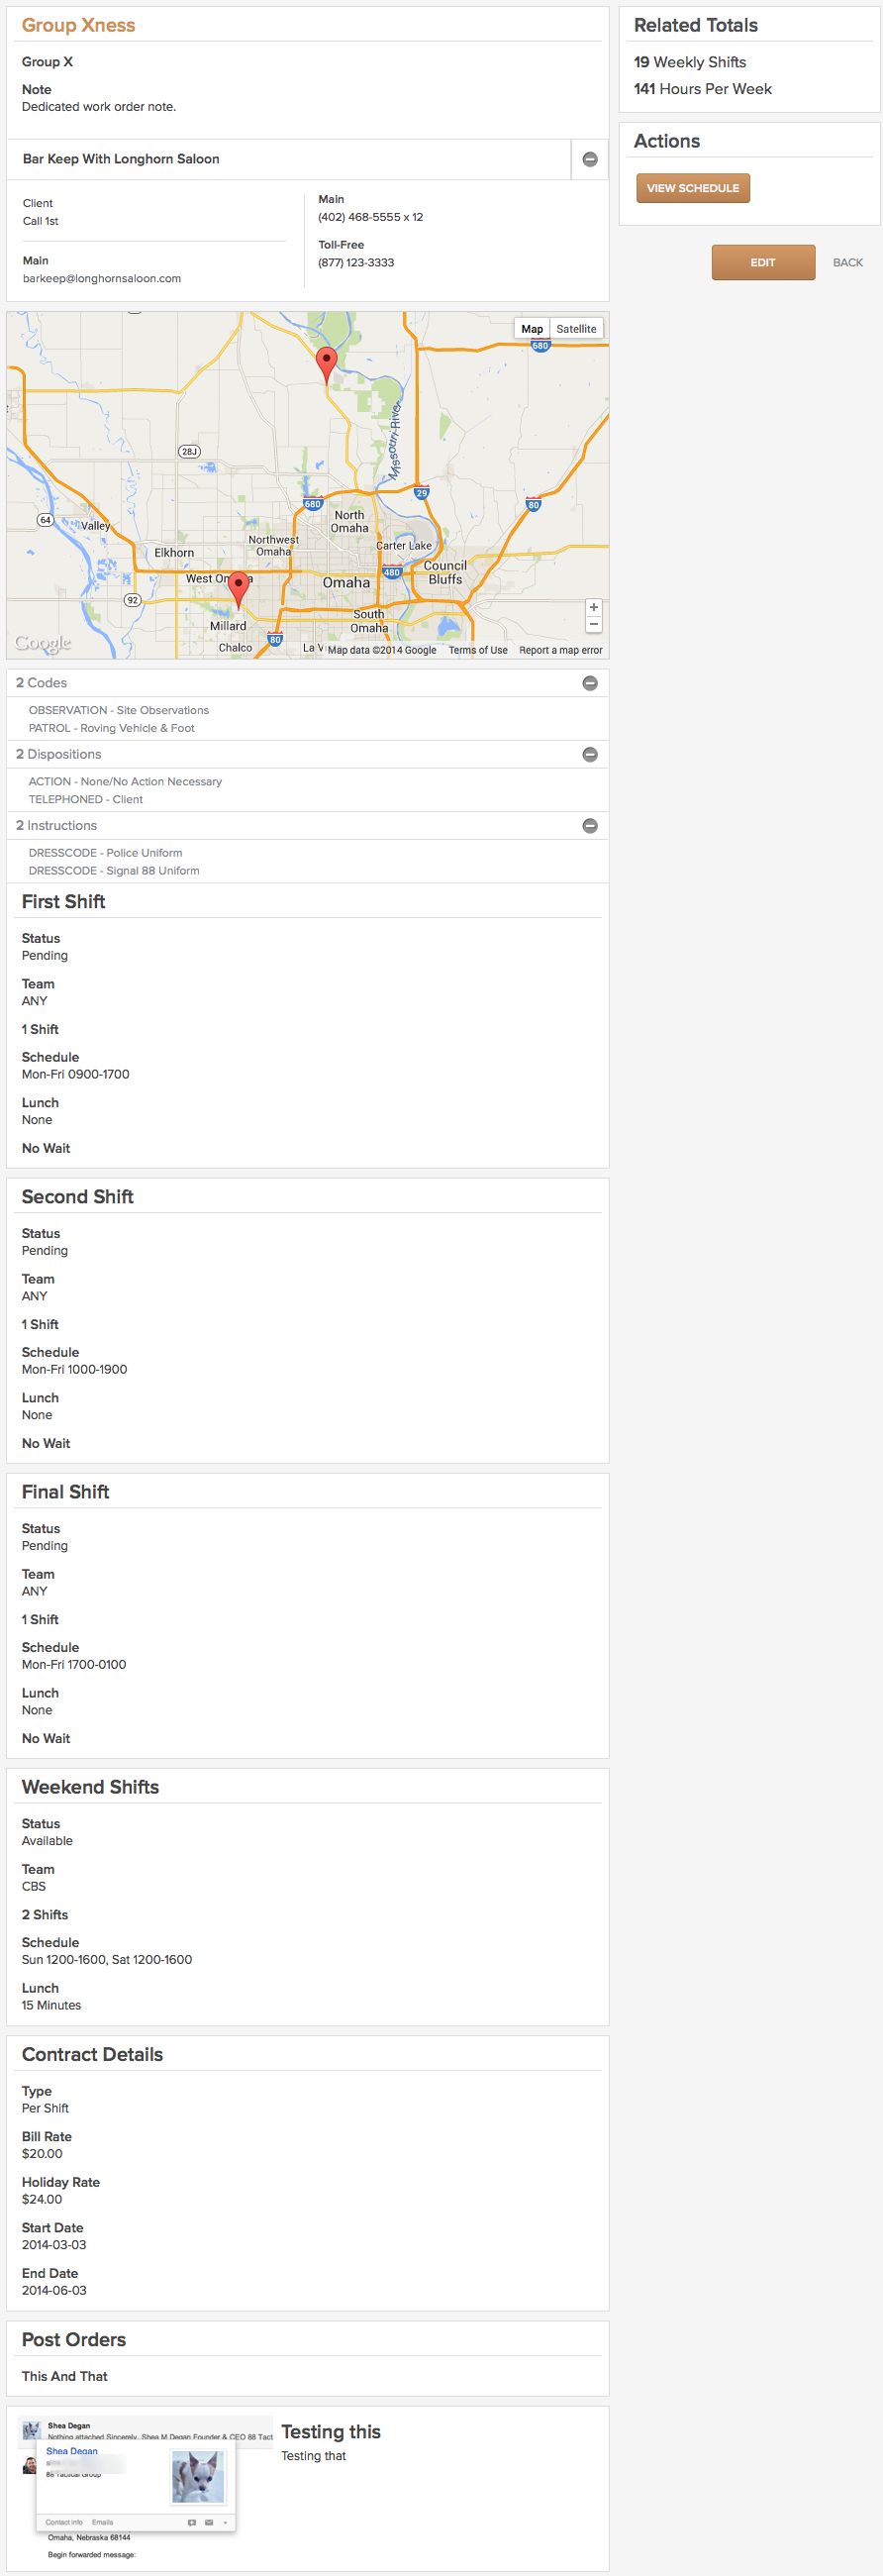
Details
Main Info
Description in Header, followed by Business - Location in sub header.
This section is just below the Main Info section, and contains any contact info that Users might need to fall back on as circumstances dictate. These will show on the Detail Pages of any Shifts generated by the Work Order.
Codes/Dispos/Instructions Collections
Those that have been defined on the Dedicated Work Order are then applied to all generated Shifts.
Days that have uniform or shared attributes are called Shift Schedules or Sets. In the example below, you can see that the Weekdays Shift Schedule calls for 2 Shifts every weekend. Within each Shift Schedule are Status, Team, Shift quantity, and Lunch/Options attributes. Shifts can be seen on the Schedule. There would be 3 Shifts starting at various times for each weekday, and 2 Shifts for each weekend in this example.
There can be one or many Shift Schedules.
Contract Details
Listed are the following details:
- Contract Type
- Per Shift
- Monthly Flat-rate
- Bill Rate
- Holiday Rate
- Contract Duration
- Start Date
- End Date
Post Orders
Documents that have been assigned to the Work Order are visible here. These documents will show up on the Shift Detail pages and the Dashboard and downloading them is logged.
Premises Pictures
These Premises Pictures will appear on Shift Details for any shift generated by this Work Order.
Form
Required Fields
- Location
- Description
- Shift Schedule(s)
- Start Date
We made it our mission to reduce the necessary validation and requirements for form submission, while ensuring data and functional integrity, and we feel like we've been very successful at doing so. We achieved that through a combination of innovative UI (User Interface) design, and a more flexible feature set throughout V2.
The Dedicated Work Order Form is separated into four logically organized steps, for now:
- Basic Info
- Create Shift Schedules
- Contract Info
- Post Orders
- Premises Pictures
- Emergency Contacts
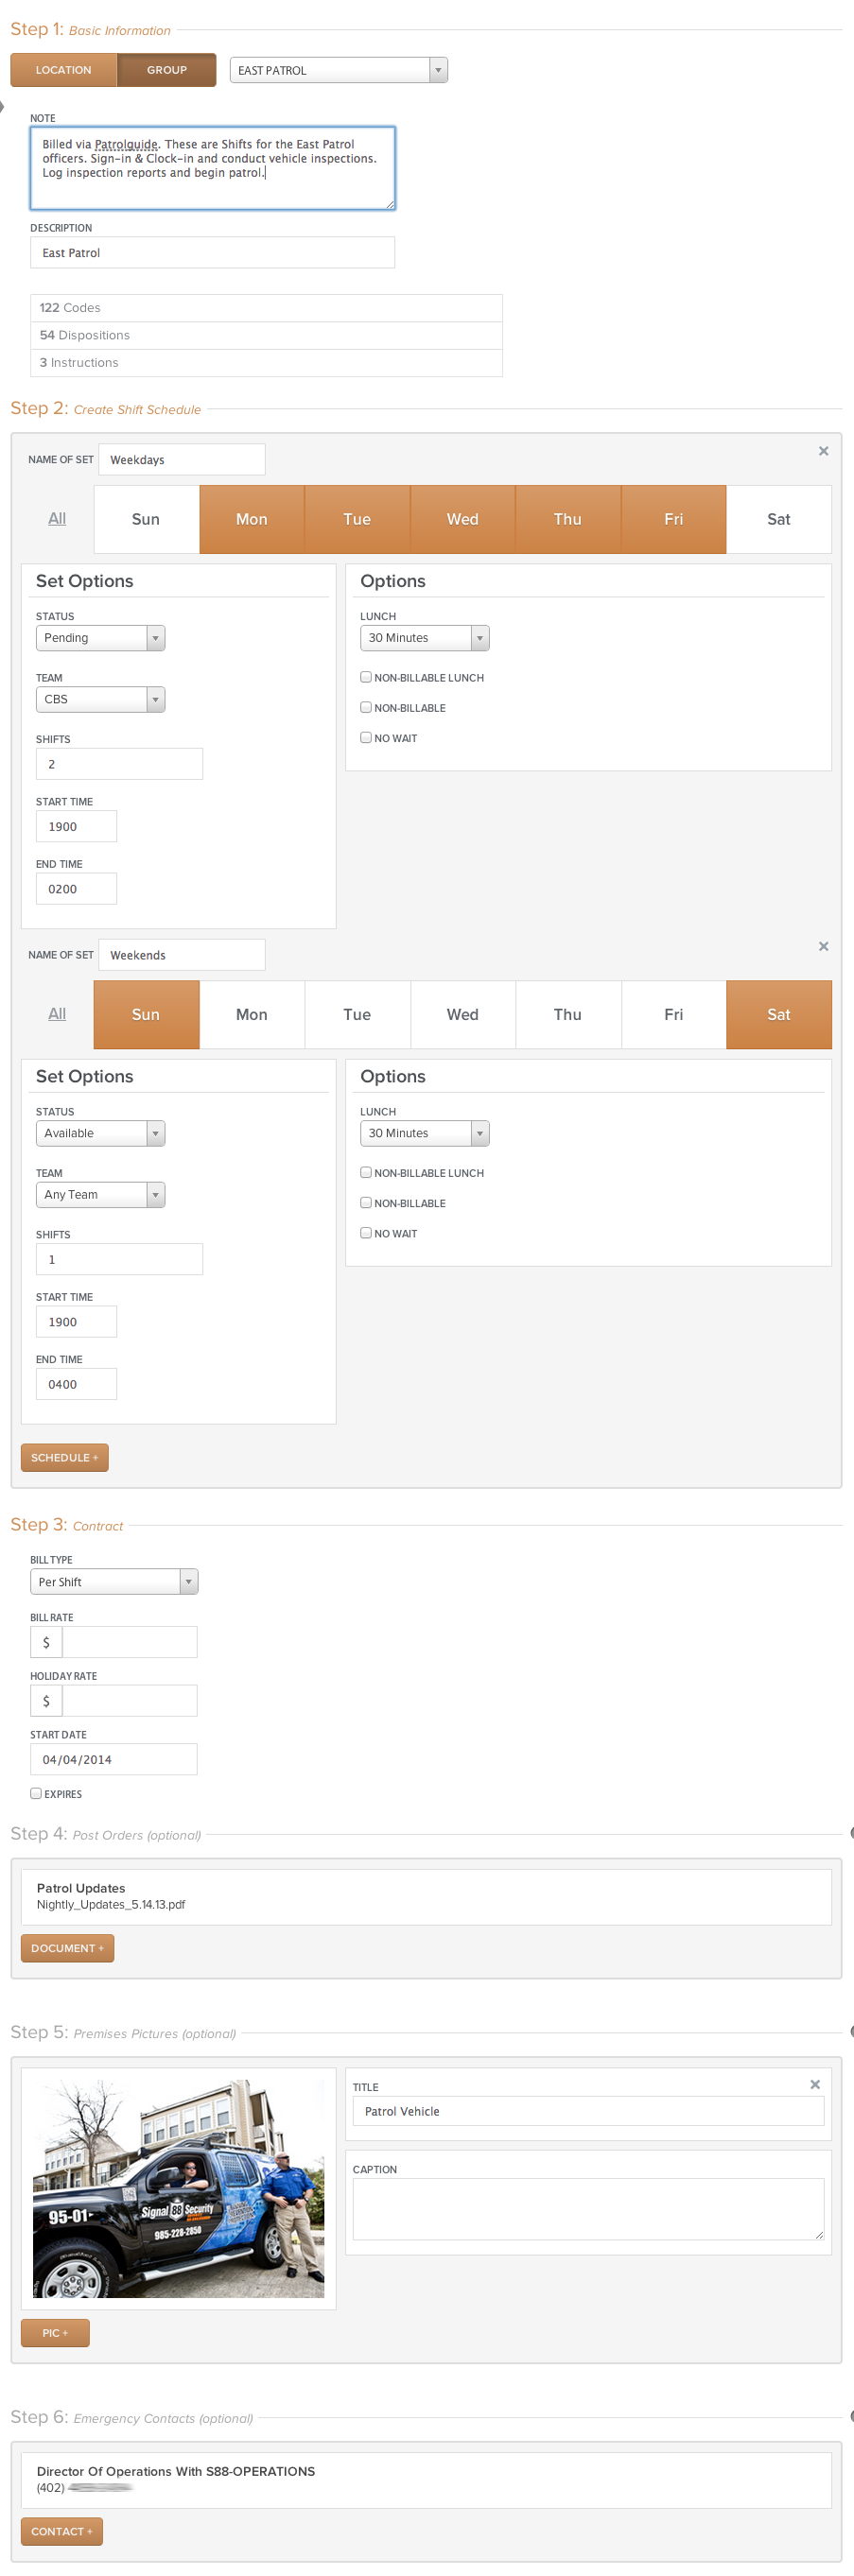
Step 1: Basic Info
Select a Location, that will populate the Business that it belongs to. Enter an optional Note, and either modify the auto-generated (and mandatory) Description, or move on to Step 2.
Step 2: Create Shift Schedules
These will describe the Shift Schedules (seen above in details. The Sets have the following attributes:
Set Options:
- Name
- Days (at least one REQUIRED)
- Status
- Available
- Pending
- Team
- Any Team
- CBS
- LEB
- Shift Quantity (numeric, up to 99)
- Start Time
- End Time
Options (additional):
- Lunch
- None
- 15 Minutes
- 30 Minutes
- 1 Hour
- 2 Hours
- Non-Billable Lunch
- Non-Billable
- No Wait
Everything here is optional except the days. Defaults are 1 Shift at 0000 - 0000 (24hrs) if the form elements are submitted empty.
In the example below, you can see how the Sets (Shift Schedules) are named according to what they are. The first Set describes Weekday, followed by Weekend.
This is the beauty of our new user interface design. It allows you to set whatever attributes you want for each set, and THEN decide what Days those attributes apply to.
Step 3: Contract
The following attributes are fairly straightforward:
- Contract Type
- Per Shift
- Monthly Flat-rate
- Bill Rate
- Holiday Rate
- Contract Duration
- Start Date (required)
- End Date (optional)
Step 4: Post Orders
Click DOCUMENT + to select and assign a document to the Work Order. These documents will appear on a Post Orders Dashboard widget for any officer working a Shift generated by the Work Order. The same documents will appear on the Shift Detail pages for those Shifts as well.
This works a bit differently than legacy Inteliguide. We needed a more useful way to work with Contacts as they related to Locations, so we built a little V2 shim, so-to-speak, to prepare for a full-fledged Contacts system that can be shared between future versions of Salesguide, Inteliguide, Patrolguide, and whatever other product we may introduce based on our Guide technology. Coming soon! That shim actually sees management of Contacts through Locations, now, as opposed to a separate management section within the Work Order itself. As explained elsewhere, we wanted to remain more consistent and contextual by moving administrative tasks into the Manage section of Inteliguide.
Given that we now have broader use for Contacts in the broader scope of Inteliguide, we wanted to tie that into the Dedicated Work Orders. We've done that by bringing in every Active Contact in the system. For that reason, there may be duplicates. But, once selected, you can easily verify the information by expanding the Contact. If it's in error, somehow, simply remove the Contact and add the correct one. We'll be working to de-dupe redundant Contacts going forward with either a background task, or some interface that you can use. Coming soon!
Contacts already Associated with a particular selected Location should auto-populate. If that auto-pop occurs, then this step will be automatically expanded so you can review the selections before submitting the Form.
Please see Emergency Contacts in Tips & Tricks for more clarification on how they're differentiated from Authorized Client Users.
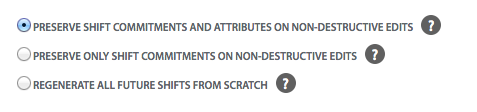
The Edit Form will have some options to help preserve some of the actual Scheduling work you may have done on future generated Shifts in the event you have to materially change the Work Order after the fact.
Those are as follows:
- Preserve shift commitments and attributes on non-destructive edits
- Attributes are team, lunch, non-billable, and no wait options. Will only preserve these attributes if future shifts aren't regenerated due to the quantity of shifts being reduced within a shift schedule, the shift schedule itself being erased, the days and/or times being modified, and/or the contract start/end date being limited.
- Preserve only shift commitments on non-destructive edits
- Will only preserve the shift commitments if future shifts aren't forced to be regenerated due to the quantity of shifts being reduced within a shift schedule, the shift schedule itself being erased, the days and/or times being modified, and/or the contract start/end date being limited.
- Regenerate all future shifts from scratch
- This is a nuclear option, and will replace and/or remove all future shifts based on your above settings.
The reason these controls are in place is due to the nature of how Dedicated Work Orders function. They generate out Shifts into the future that must then be manipulated, scheduled, and eventually worked. As is the case from time to time, Work Orders need to be updated to reflect changing contract terms and client requests. This poses a problem when changes to the Work Order might prove destructive to any future scheduling work, such as Commitments and modifications. These controls will allow you to more closely define what should be replaced and what should be preserved while updating a Work Order.
0 Comments